Tag Archives: health and beauty

Healing Yourself Naturally: Poultices, Salves, and Tinctures

By Halcyon

As with Whole Beauty, this column discusses practices that may not be appropriate for everyone. In addition, the advice given here is not intended to replace a visit to your doctor – much of the modern research into the efficacy of natural remedies is still in its early stages, and not all results seen in the laboratory translate to the real world. Remember that no matter what changes you’re considering, it’s always best to discuss them with your doctor or other health care provider, as he or she will be in the best position to address not only your personal needs and special concerns, but also the safety of alternative treatments, as herbs and supplements may interact both with medications and each other – however, if you’re interested in natural healing, we hope this article will provide you with some opening discussion points!

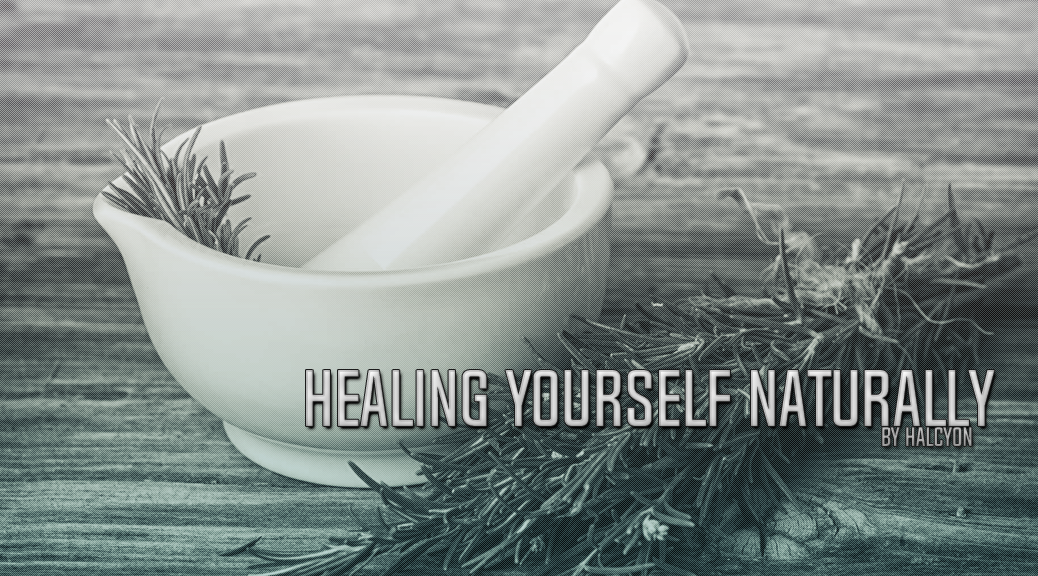
Healing Naturally: Poultices, Salves and Tinctures

Poultice:

* A poultice is nothing more than a direct way to apply herbs to the skin.

How to make a poultice:

* Herbs are usually crushed into a pulp or made into a paste that is spread directly onto the surface of the skin (up to an inch thick). The area is then wrapped in gauze or muslin, preventing the poultice from rubbing off.

There are different types of poultices:

* A warm or hot poultice will help increase circulation to the skin area.
* A cold poultice can help soothe a variety of inflammation.
* Skin-tingling ginger can be added to help increase circulation.

The Advantage:

* Poultices use fresh herbs, which have the greatest amount of the herb’s beneficial characteristics.

The Disadvantages:

* Poultices take time to make and time to do their thing, and are messier than a salve or cream.
* It’s best to use them at night so they can work while you sleep.

Some herbs you can use for poultices are:

* Yarrow
* Goldenrod
* Plantain
* Comfrey
* Calendula

General All-Purpose Wound Healing Poultice:

* Calendula: skin healing antimicrobial
* Comfrey Leaf: tissue healer and excellent to coat and seal broken skin
* Yarrow: Wonderful for healing, cracked skin, cuts and bruises. It can help staunch bleeding, too.

Salves:

* Medicinal herbs mixed with oil and thickened with beeswax.
* Salves create an easy vehicle by which the skin can absorb the healing properties of the ingredients.

Before you can make a salve, you need to make an oil infusion. There are quicker ways to do this, but I generally believe quick work can result in shoddy work, and you don’t want shoddy salve:

The Slow Way to Make an Oil Infusion

You’ll need:

* 2 cups of dried herb (loosely packed)
* Up to 2 cups of olive oil (see note)
* Sunny windowsill
* Pint-sized mason jar

Instructions:

Add the dried herb to a sterilized mason jar. Add olive oil until all the herb is covered. Use a skewer to stir and release air bubbles. Cap the jar tightly. Set the jar in a sunny window for 4 weeks, shaking gently every day or so.

When the time is up, separate the oil from the plant matter by straining it through a fine mesh strainer lined with cheesecloth. Be sure to squeeze the cheesecloth to release the last bit of oil.

* Be selective when choosing olive oil. Many brands cut their olive oil with canola oil which can make your infusion go rancid far sooner. The general shelf life for this type of infusion is twelve months.

Making the Salve

You’ll need:

* 1 1/4 cups infused oil (if you followed the instructions above, you should have about 1 1/4 cups oil)
* 1.5 oz (about 1/3 cup) beeswax pastilles
* Heavy-bottomed pot
* 10-20 drops of essential oil (optional)
* Whisk
* Glass measuring cup
* 5 4-ounce mason jars/jelly jars
* Spatula

Instructions:

* Add the beeswax to a heavy bottomed pot on the stove, and heat on low (you don’t want to burn it). Use the lowest temperature possible, as this will ensure that the beeswax retains some of its healing properties. Beeswax melts at 140 degrees.
* Once the beeswax melts, then whisk in the herbal oil.
* The cooler temperature of the oil will resolidify some of the beeswax, so continue whisking until the beeswax is completely melted and the two are mixed well.
* Add the essential oil, if you’re using it. Start by adding one or two drops at a time until you’ve reached your desired strength of fragrance.
* Resume whisking until all ingredients are completely melted and mixed together.
* Quickly pour the mixture into a glass measuring cup, then fill the jelly jars or tins. I reused a few sanitized, store-bought tins.

Note: The beeswax-oil mixture will solidify quickly in the measuring cup, sometimes before you’ve even finished filling the jars. If this happens, simply use the spatula to put the mixture back in the pot on the stove and melt it again.

* Let the jars cool for up to 24 hours, then cap them tightly and label.

Soothing Salve with Lemon Balm and Calendula:

* 1 1/4 cup calendula infused oil
* 1 1/4 cup lemon balm infused oil
* 3 oz beeswax pastilles (about 2/3 cup)
* Follow directions as outlined above. You’re doubling the recipe, so you’ll need approximately 10 jelly jars, rather than 5.

Calendula and lemon balm both have anti-bacterial properties. Together, they are also anti-inflammatory and anti-viral. This salve will help soothe insect bites and rashes, and help repair cuts and scrapes. In addition, lemon balm is effective at healing cold sores, while calendula is effective at soothing eczema.

Note: You may want to get a pot that you only use for making herbal preparations in case there’s any residue leftover, though I didn’t have any trouble washing my pot and utensils as I would my other dishes.

Tincture:

* A concentrated liquid extract of herbs, taken by the drop because it is so potent.
* Most tinctures are made by using alcohol as the extracant. Some prefer to use apple cider vinegar or vegetable glycerin (diluted with an equal amount of water) instead. These alternative won’t be as strong, but they will work.

Nettle Tincture

* Supports joint health and is accessible in many places across the United States.

Ingredients:

* Nettle, fresh or dried
* Brandy or vodka

Materials:

* Gloves
* Mason jar
* Muslin or cheese cloth
* Labels
* Amber Dosage Bottles
* Small funnel
* Large bowl
* Liquid measuring cup

The first step in this process is harvesting the nettles. Nettles are often found growing abundantly in the wild, but if you do decide to do some wild harvesting, I would suggest that you get a Peterson’s Field Guide or find an herbalist to help you identify the plant. If you prefer, you can purchase nettles in bulk on Mountain Rose Herbs. They are a great site for a variety of loose leaf herbs, teas, and other supplies.

If you are working with fresh nettles, it is recommended using gloves and wearing clothing to cover your skin to avoid a sting that may itch and tingle for a few hours. Chop the nettles as small as possible – the more herb chopped, the more surface area covered during the maceration (or extraction) process.

Fill your Mason jar about 1/4 full of freshly chopped herb, and cover all the way to the top with alcohol. If using dried nettles, fill jar halfway instead, then cover as before with alcohol.

Put the cap on the jar, sit it upright, and label it. Here’s a suggestion:

1. What kind of alcohol you used, and the percent of alcohol by volume.
2. Whether you used fresh or dried herb.
3. The common name and the binomial/scientific name of the plant used (nettle’s scientific name is Urtica dioica).
4. The date you made the tincture.

Let the mixture macerate. Shake the jar every day and store it in a cool dark cabinet. Make sure the herbs stay covered with alcohol – add more if needed. This is a great time to put good energy into your herbal creation and visualize all the ways it’s going to help you once it’s finally ready.

After 4-6 weeks have passed, you can then press out your tincture. Don’t worry too much about the time. Some folks wait as little as three weeks and some wait much longer.

To start the pressing process, unscrew your Mason jar, put your muslin or cheese cloth over the top, and flip the jar over above a large bowl to drain the liquid while separating the herb. Once all the liquid has gone into the bowl, you can then use both hands to squeeze any remaining liquid out of the herb.

Lastly, make a new label that replicates the first one for each dosage bottle filled. Store in a cool dark place and enjoy! It is suggested taking one-half to one teaspoon of nettle tincture two to three times a day when you feel like you need some joint support or an herbal tonic.

Whole Beauty: DIY Edition

By Halcyon

In this issue, Halcyon shows us how to make our own beauty products at home! While the majority of these recipes should be safe for anyone without allergies to their ingredients, some do include essential oils. Remember that essential oils should never be applied to the skin without being diluted first, and that some, such as citrus oils, can cause photosensitivity when exposed to sunlight. Always do your research first, and if you have questions or concerns, be sure to bring them up with your doctor or other health care provider!

DIY: Lotions and Potions and Scrubs, oh my!

This installment of Whole Beauty is all about Doing-It Yourself. Get in your kitchen, take out those mixing bowls, and get cracking! It really is very easy and a lot of fun. If you have kids, get them in on the action. You may want to do a test-run before you let them join in, or just read over the recipes and decide what your child can do.

These are not my own creations, though I have tweaked them a bit for what works for me. Pinterest is a treasure trove of ideas for DIYs. A lot of the time it is trial and error, but don’t give up. You will save a lot of cash by doing this at home, and most of all, you will know exactly what is going into your product. As someone who has very sensitive skin, I’ve had to learn to do it myself because I’ve had reactions to some very expensive products – even those said to cater to allergy-sensitive skin. But no more.

For those who need to budget like me, you may not be able to do this tomorrow. Plan it out, investigate the prices on items you may need, and just parcel it out. Sometimes you can strategise it for sales on Amazon (or wherever you may shop) and get great deals on all your DIY needs.

Here we go:

Lavender Lemonade for Migraine and Headaches

Ingredients

* 1 drop of lavender essential oil
* 6 lemons
* 1 cup of honey
* 12 cups of water
* 1 tbsp of raw honey for sweetness

Directions

1. Peel the lemons, and then squeeze them in a pitcher.
2. Add water, honey and one or two drops of lavender essential oil. Mix all the ingredients.
3. Store the drink in the fridge.

This is really very refreshing, and you will be amazed at how it seems to alleviate headaches. I am not sure of the reasons why, aside from lavender always having been a calming herb, but anything to help a migraine is awesome in my book!

Impurity Removing Face Mask

Ingredients:

* 2 tablespoons bentonite clay
* 3 capsules activated charcoal
* 3-4 teaspoons aloe vera
* 1-2 teaspoons shea butter
* 1.5 oz camomile tea
* 1 drop peppermint essential oil (optional)
* 1 drop eucalyptus essential oil (optional)

Directions:

* Start by brewing the tea
* Melt the shea butter in a double boiler
* When the tea is ready and the shea butter is completely melted, mix them together
* Mix the bentonite clay and the activated charcoal in a seperate container
* Add the clay and charcoal mix to the shea and tea mix and stir
* Add the aloe vera and essential oils and continue to mix well
* Store in an air-tight container

* To use: Apply all over face and keep on for about fifteen minutes. Wash off well and admire your soft skin!

Homemade Hydrating Lotion

Ingredients:

* A food processor
* A double broiler
* 1 cup room temp. herbal tea (I like the chamomile variety for this)
* 1/2 cup coconut oil
* 1/4 cup shea butter
* 3/8 cup sweet almond oil
* 1/8 cup extra virgin olive oil
* 4 tbsp beeswax pastilles
* 1-2 tsp total of essential oils of your choice. I used the following Doterra oils: Lavender Oil, Helichrysum Flower Oil, and Rose Flower Oil.

Three Easy Steps:

Step One: Brew

* Brew the tea. Boil the water, steep the tea, and bring to room temperature.

Step Two: Melt

* In the double boiler, melt the butters, oils, and beeswax together. Do not add the essential oils yet.

Step Three: Emulsify

* Pour the melted oils into the food processor and lock the lid. Turn the food processor on, and slowly pour 1 cup of herbal tea into the mixture. It should begin to emulsify. Leave it running for another thirty seconds after you’ve poured in all the tea. You may need to stop the food processor and scrape the sides to blend completely. Add the essential oils of your choice and blend for another thirty seconds.

Storage and expiration:

* This recipe will make 2-3 cups of lotion. If you don’t want this much lotion, cut the recipe in half. The lotion should keep pretty much indefinitely in the fridge without added preservatives. You can put it into a couple of small containers holding a few ounces and then just refill. I suggest if you live in a hot climate like I do, you keep a larger jar in the fridge and refill from there. You may have to let it come to room temp. If it gets too hot, it might lose its consistency.

* The lotion goes on cool and smooth and absorbs quickly, leaving your skin nourished and hydrated. It smells amazing and does not leave a greasy residue or shine on your skin. It is completely safe to use on your kids. (Heck, you can even eat it, but I don’t think it would taste very good!)

Facial Moisturizer

* 1 cup aloe vera gel (This bit is important. In the comments, a few people have tried to substitute plain Aloe juice, or home-made gel, but it doesn’t have the stabilizing properties needed. It has to be a gel.)
* 3/4 ounce (by weight) beeswax – I buy mine in a bar and grate it. You can buy it in pellets, too – make sure you get the kind for cosmetics, not candles. Some of the latter come scented. The beeswax is in there as another stabilizer. When you make an emulsion like this, you are essentially mixing water and oil – two things that don’t mix. Instead, they will sit next to each other. Tiny blob of oil, then tiny blob of water, tiny blob of oil, etc. When the lotion separates, it is because those tiny blobs touch others of the same type and create a bigger blob of oil or a bigger blob of water. This causes a chain reaction and the mixture separates. I’ve added the wax because it will blend with the oils and make them less fluid (since it is solid at room temp). Hopefully less fluidity will mean less separation.
* 1/4 cup almond oil
* 1/4 cut coconut oil
* 10 drops of your favorite essential oil (Please note that essential oils are serious business. Always take into account the oil you are using and its affects. I like grapefruit, but it can increase sun sensitivity. Also, be sure to test the oil on your skin ahead of time to note any allergic reactions, as well as researching whether they may react with your medications or medical conditions.)
* Chocolate/soap melter or double boiler
* Blender

Directions:

This moisturizer has been one of the most popular posts on the site for over a year! In that time, I’ve made this recipe several more times, and I’ve talked to many of you about your tips and tricks. I’ve assembled the most common into a FAQ at the bottom of the page. Check it out!

1. Start by melting the beeswax and coconut oil in the almond oil

2. Pour the melted oils into your blender and walk away. It is super-duper essential that this stuff gets cool before you start to blend. There is no getting around this. For me it took about an hour and fifteen minutes. If you don’t let it cool, it separates later, which is gross. Trust me.
(Note: Some readers have had better experiences in blending if the oils are just-barely-warm, and the blender/aloe mixture is also just-barely-warm. Try it and let me know what happens!

3. Mix the essential oil into your cup of Aloe Vera Gel.

4. Fire up the blender. Slowly pour the aloe vera gel into the blender as it whips. It will transform from a thick oil to a light and fluffy, more lotion-like texture. The first time I did this, I had to call my husband into the room to look – it’s for-real lotion!

5. That’s it! You’ve made your own facial moisturizer! Store some in a small container for your vanity and put the extra in the fridge. Keep in mind that lotion has a shelf life. Don’t use anything that looks/smells/feels wrong.

DIY Lotion Frequently Asked Questions:

If the lotion fails to mix correctly, try these approaches:

* Be sure to scrape the bottom of your blender several times during the blending step. Sometimes oils and wax sink down there and it will cause a watery consistency in the lotion.
* Add the aloe to the oils ever so slowly. We are creating an emulsion, mixing two items that can’t be mixed. We have to do it slowly for even distribution.
* Some have suggested making sure the oils and the aloe mixture are at the same temperature and a little above room temperature for optimum mixing. Perhaps wait until the oils are just warm to the touch, and heat the aloe gel to the same (probably about ten seconds in the microwave) before blending. Avoid cold aloe gel or blending in a cold blender.

If after all this, the lotion comes out slimy or separating, transfer into a bowl with a hand mixer or a stand mixer and whip the ever-loving daylights out of that bad boy! Additionally, you can use it as-is. It’s still a great moisturizer; it just doesn’t look as pretty. This is the price we pay for avoiding chemical stabilizers and preservatives

Whipped Magnesium Lotion

Ready-made magnesium lotion is not cheap. Prices on Amazon range from $9 to $20 for a small 8oz bottle. This is why I chose to make my own magnesium lotion, and have loved the results with this recipe.

Magnesium Lotion Supplies:

* 1/2 cup magnesium flakes
* 3 tbsp boiling water
* 1/4 cup cocunut oil
* 2 tbsp beeswax pastilles
* 3 tbsp shea butter
* 1 quart mason jar
* 2 coffee mugs
* Immersion blender
* Essential oils for scent (optional – I like lavender and rosemary together)

Magnesium Lotion Directions:

1. Measure the magnesium flakes into a mug. Fill another mug halfway with water and microwave on high until it is boiling, abut two to three minutes. (Alternatively, you can bring water to boil on the stove.)

2. Measure 3 tbsp of boiling water into the mug with the flakes. Stir until the flakes are dissolved and set aside.

3. In the quart mason jar, measure coconut oil, beeswax and shea butter. Place the jar in a small pan filled with one inch of water. Place it on the stove and turn the heat to medium high.

4. Allow the solids to melt, swirling the jar occasionally if necessary. (Be sure to wear an oven mitt.)

5. When everything inside the jar is melted, remove it from the pan and let it cool for about five minutes.

6. Pour the dissolved magnesium into the quarter mason jar. If it solidifies upon contact, that’s ok. Add essential oils (if using). Place the immersion blender at the bottom of the jar and blend everything together well, moving the blender up and down along the sides of the jar as necessary to incorporate the ingredients.

This makes about eight ounces of lotion. Store at room temperature for up to two months.

Home Made Healing Salve With Five Ingredients

Ingredients:

2 tbsp beeswax pellets
2 tbsp shea butter
1/4 cup coconut oil
1/2 cup sweet almond oil
15-20 drops therapeutic grade essential oils (I used lavender essential oil)
4 oz. tin containers

Directions:

1. Combine beeswax, shea butter, coconut oil, and sweet almond oil in a glass measuring jar.

2. Place the measuring jar in a small pot on the stove. Fill the pot about one-quarter of the way with water.

3. Bring your water to a boil over medium heat.

4. Stir occasionally until the contents of the jar melt (about fifteen minutes), then add your essential oil.

5. Carefully pour hot salve into small tin containers.
Warning: Use caution – the homemade healing salve mixture will be very hot!

6. Let your salve set overnight.

7. Enjoy!

DIY Cellulite Scrub

Ingredients:

1/2 cup coffee grounds
1/4 cup sugar
1/4 cup olive oil

Directions:

* Mix ingredients together in large bowl
* Apply in a circular motion to targeted areas on the body for approximately five minutes
* Rinse off with warm water
* Pat dry with a towel

The caffeine and antioxidants in the coffee grounds stimulate and dilate your blood vessels, which tones and tightens the tissue. The sugar further helps exfoliate, while the olive oil gives a big dose of hydration and plumping.

Now, you finally have something to do with the grounds after you brew yourself a cup of fresh coffee!

Homemade Tiger Balm

Ingredients:

1/2 cup olive oil
2 tbsp beeswax
1.5 tbsp menthol crystals
30 drops camphor essential oil
20 drops eucalyptus essential oil
10 drops cajuput essential oil
10 drops cassia essential oil
5 drops clove essential oil

Directions:

1. Fill a medium sized pot half way full with water.

2. Place a glass purex bowl in the water.

3. Add olive oil, menthol crystals and beeswax.

4. Turn stove top to medium heat.

5. Once the beeswax is melted, remove from heat.

6. Add essential oils.

7. Pour into 4 ounce jar.

I use Mountain Rose Herbs for everything. I also use Amazon for beeswax unless I stock up at the Rennaissance Festival for some good stuff there.

DIY Homemade Makeup Remover Pads

Ingredients:

* 1 quart wide mouth jar
* 2 tbsp of coconut oil
* 2 squirts of tear-free baby wash
* 2 cups of purified water
* 2 packages of cotton pads
* Optional: Tea tree essential oil (will help with acne, but should not be used on the eyes) or frankincense essential oil (will help rejuvenate the skin and decrease the appearance of fine lines and wrinkles)
* Microwaveable bowl

Instructions:

1. Mix 2 tablespoons of coconut oil, 2 squirts of tear-free baby wash, and 2 cups of purified water.

2. Microwave in ten to twenty second increments until melted and well blended.

3. Place about fifty cotton pads in you quart jar.

4. Pour the liquid mixture over the pads in the jar. Press the pads down to help soak up the liquid. Add more pads to fit, again pressing down.

5. Secure lid tight and keep in a dry, cool place.

6. Use the pads to remove your makeup daily.

Honey Sugar Scrub

Honey is a humectant. It also contains anti-bacterial properties tat help get rid of bacteria on your skin that can cause acne and other skin imperfections.

Sugar is a natural source of glycolic acid, an alpha-hydroxy acid (AHA) that penetrates the skin and breaks down the bonds of dead skin cells, encouraging cell turnover and generating fresh skin layer.

Ingredients:

* 1 tbsp raw honey
* 1 tbsp white/brown sugar
* 1 tbsp of olive oil (optional)
* Your favorite essential oil (optional)

Black Head Clearing Scrub Using Salt

Benefits:

* Salt helps to reduce excess oil on the skin. It is also a great natural scrub to get rid of blackheads thanks to its exfoliating properties.
* Rice flour, just like salt, exfoliates the upper layer of skin, exposing blackheads and making them easy to remove with scrubbing.
* Lemon juice is a natural astringent and loosens the blackheads.
* Lemon juice also has anti-microbial and skin cleansing properties that inhibit the growth of bacteria in pores while cleansing the skin.
* This scrub helps control oil/sebum secretions, thanks to the lemon, which balances the sebaceous glands.
* The exfoliating properties of this scrub can, with regular usage, eliminate not just blackheads, but whiteheads, too!
* The scrub can be used under the lips, on the nose and anywhere else to where you get blackheads.

Ingredients:

* 1 tsp salt (table salt, pink salt or black salt)
* 1-2 teaspoons of rice flour
* The juice of half a lemon.

Directions:

1. Place 1 teaspoon of salt in a small bowl.

2. Add 1-2 teaspoons of rice flour and mix the dry ingredients well.

3. Add in juice of half a lemon.

4. If using essential oil, add and mix well. My favourite is tea tree oil, as it helps me to get rid of acne on my face and some ingrown hair bumps on legs. You can add lemon essential oil (as it has the skin lightening ability and controls sebum production), or lavender essential oil to get relief from dry skin.

If you feel the scrub is too dry, you can add more lemon (or, if you have sensitive skin, you can add in water to achieve the desired consistency). Mix everything well and apply on your nose or any area that is prone to blackheads. You can first wash your face with warm water to open the pores and soften the blackheads. Let it stay on for a few minutes, then scrub thoroughly yet gently for another three to four minutes. Rinse it off and moisturize.

Store any remaining scrub in an airtight container. You can adjust the proportion according to your need of use.

Alright! That’s it for now. I hope you might find some uses for these DIYs, and that it will get you experimenting and having fun while saving money, along with the knowledge you are using good stuff on your skin.

Whole Beauty: The Holistic Body

By Halcyon

Whole Beauty took a break while we introduced you to new features, but it’s back in force now! In this issue, Halcyon delves deeper into the nuances of holistic care. Please remember that it’s always advised to discuss changes in your regimen with your doctor or other health care provider, as he or she will be in the best position to address not only your personal needs and special concerns, but also the safety of alternative treatments, as herbs and supplements may interact not only with medications, but also each other – however, if you’re interested in holistic care, we hope this article will provide you with some opening discussion points!

The Holistic Body

In this edition, we’ll look at ways in which the entire body can be treated naturally. These methods are also known as alternative healing or alternative body treatment, and may include:

• Eating Whole Foods
• Acupuncture
• Aromatherapy
• Cupping
• Juicing
• Vitamin Therapy

Allopathic vs Holistic

Allopathic (traditional) medicine focuses on attacking one particular symptom. For example, if you have an allergy, the allopathic approach would be to suppress your body’s immune system to stop the sneezing (ex. giving an antihistamine). The problem with this is that sneezing is your body’s defense mechanism, ridding your body of harmful toxins. Suppress that sneezing and the toxins will go deeper, causing greater harm to your body in the long run. However, the holistic method treats the person as a whole by trying to combat symptoms without suppressing the immune system (source: www.joyfulhomesteading.com).

Let me give you a brief glimpse into why some of these holistic methods are advantageous to your health and why you may want to give it a try.

Whole Foods

I could write an entire series of articles on the benefits of whole foods and why we should be eating them, but for the purpose of this article, we’re just going to cover Powerful Food Combos (source: www.lauraconrad.com).

10 Powerful Food Combos

• Tomato + Avocado = Fights Cancer
• Sweet Potato + Coconut Oil = Healthy Skin
• Oatmeal + Peanut butter = All Day Energy
• Black Beans + Lime = Healthy Lungs
• Apples + Dark Chocolate = Heart Health
• Almonds = Yogurt = Bone Strength
• Hard Boiled Eggs + Banana = Energy Boost
• Lemon + Kale = Muscle Strength
• Kombucha + Cashews = Immunity Boost
• Garlic + Salmon = Anti-inflammatory

Acupuncture: Five Reasons To Give It A Try

• Head: 20 sessions of electroacupuncture (where a small electronic current is applied to the needle) can reduce the number of monthly migraines.
• Immune System: Well placed needles can boost immune activity and cells and destroy infections.
• Sleep: Acupuncture can rev up the production of neurotransmitters associated with relaxation and sleep, helping with those with insomnia.
• Weight: Acupuncture helped obese adults shed up to 9lbs over a span of 2 weeks to 4 months.
• Back: About 10 sessions of needling was found to retrieve lower back discomfort for 6 months.

Aromatherapy

This is a type of holistic treatment aimed at the physical body and soul. It includes healing with both scent (aroma) and touch (body massage).

Scent triggers an area in the brain called the limbic system. When stimulated, the limbic system releases endorphins and other “feel-good” chemicals. You can achieve this effect through either direct inhalation or diffusion.

Aromatherapy also works through the absorption of essential oils by the skin and into the blood stream. The best way to experience this is through massage therapy, which sometimes combines carrier oils with specific essential oils.

Five Ways Aromatherapy Can Help You

• Relaxation and stress relief
• Create balance and well-being
• Boost immune system, respiratory and circulation system
• Enhance mood
• Aid cardiovascular system and digestive system.

Five Ways To Utilize Aromatherapy

• Bath
• Compress
• Massage
• Inhalation
• Diffusion

Three Of My Favorite Oils

• Lavender: Improves cognitive performance as well as mood. It has also long been known for its mild sedative and calming effects.
• Lemon Oil: Has some anti-depressant type effects, making it a good choice for stress relief and elevating mood. Some also say it can help improve focus.
• Rosemary: With its distinctively woody fragrance, rosemary has been used for centuries for a variety of health and beauty benefits from mental clarity to skin care. My favorite use for rosemary is for migraine. Apply directly to the temples and forehead, or cup oiled hands to your face and breathe in.

Editor’s Note: Essential oils are highly concentrated, packing many compounds into small doses. Even those originating from edible sources may become toxic at the levels found in pure oils, resulting in anything from skin irritation to acute poisoning. Because of this, nearly all essential oils must be diluted with a carrier oil as mentioned above. Please do your research to be sure you’re using essential oils safely!

Cupping – What Exactly Is It?

Cupping is essentially a form of body therapy that uses suction from the cups to achieve the desired result. This stimulates blood flow and provides many other health benefits. There are two methods of cupping:

• In a single area (static cupping).
• By moving the cup around to several places (similar to massage, but with the addition of suction).

Does It Work?

In the theoretical sense of what cupping does and how it is performed, it makes sense that cupping can reduce pain and support healing. However, when it comes to clinical evidence, things are inconclusive. There have been few quality, large-scale trials, and it is difficult to use information from trials because the focus on a collective group may ignore individual differences. This means that while cupping may work for someone with tight back muscles or a herniated disc, it may not be as effective for someone with sciatica or joint problems, but the trials do not look at those specific differences.

A Few Of The Benefits Of Cupping

• Release illness-causing stagnation: Allergies and colds are often said to be a result of stagnation of the lungs. The darker the color of the cupping mark, the more stagnation is released.
• Pain and inflammation: As massage techniques manipulate blood flow to muscles to release trigger points and flush out inflammation, cupping therapy can do the same for areas of the body with less fatty tissue, like the back and shoulders.
• Increase circulation and speed healing: Cupping can sometimes stimulate blood and lymph flow to areas of stagnant injury.

Juicing

Experts recommend at least six to eight servings of fruist and vegetables a day. Sadly, most of us don’t get that amount regularly. It’s not necessarily because we don’t like it, but because busy schedules often mean we’re eating on the run. There is also, in some cases, an inability to wolf down that amount of fruit and greens in one sitting. Juicing to the rescue!

• Juicing allows more nutrients to be absorbed without throwing a huge monkey wrench of fiber into the works for you to digest. If you struggle with IBS or IBS-D, then you understand what I am talking about.
• Similarly, juicing helps to lower blood sugar by allowing you to consume more fruits and vegetables without overloading your digestive system.
• You may be able to consume a wider range of vegetables, which allows your body to get more nutrients.
• Juicing helps fight cancer. Okay, I’m in no way saying it cures cancer, but it can only help your overall health and definitely boosts your intake of the antioxidants known to be cancer fighters. Besides, prevention is better than a cure!
• Juicing is great for lowering cholesterol. There’s much more involved to lowering cholesterol than juicing alone, but if you include it in a diet of no saturated fat, no beef, and no pork, while adding more fruits, oats, seafood, and chicken, it can provide further assistance.

Vitamin Therapy (AKA Vitamin Drips)

This delivers vitamins, minerals, and amino acids directly to the body for maximum absorption at a cellular level that would not be tolerated orally. Some benefits include:

• Increases energy
• Aids weight loss
• Improves mood
• Decreases anxiety
• Improves chronic pain and migraine
• Boosts the immune system
• May help PMS

I hope some of these ideas and methods for treating your body holistically have helped, and if so, that it gives you a start to setting you on a path for a healthier and happier life!

Healing Yourself Naturally

By Halcyon

Whole Beauty is taking a break, but don’t worry – Halcyon’s launching a series of new series, all designed to keep you at your best!

Please note that, as with Whole Beauty, this column explores practices that may not be appropriate for everyone. In addition, the advice given here is not intended to replace a visit to your doctor – much of the modern research into the efficacy of natural remedies is still in its early stages, and not all results seen in the laboratory translate to the real world. Remember that no matter what changes you’re considering, it’s always best to discuss them with your doctor or other health care provider, as he or she will be in the best position to address not only your personal needs and special concerns, but also the safety of alternative treatments, as herbs and supplements may interact both with medications and each other – however, if you’re interested in natural healing, we hope this article will provide you with some opening discussion points!

Healing Yourself Naturally:
An introduction into alternative medicine

In a day where the rising cost of medical insurance is making it difficult for many people to visit a doctor or clinic and pharmaceutical companies are hijacking their wallets, the area of alternative medicine is capturing the attention of a much wider audience. Holistic care is no longer being viewed as a relic from the past – a hobby to dabble in or something our great-grandparents practiced because their health care resources were limited. Even science is backing up the benefits of alternative medicine as something that can be used use in conjunction with modern medical treatment.

In this progressive series, I’m going to give you a tour of the Modern Herbalist Apothecary – common herbs you may find nearby to use for the treatment of minor illnesses and injury, and even some that, in conjunction with a physician’s treatment plan, can help you feel better, faster. I will be giving a broad overview of some of the common approaches of alternative medicine and how they differ from one another, and what you could label as more popular. We will take a look at the science behind what makes these herbs so special and how you can use it. I hope this information enlightens you and encourages you to investigate the fascinating realm of alternative medicine.

Stocking a Modern Apothecary

There are quite possibly thousands of herbs that you could use stock to a modern apothecary, if you had access to them all. I am going to pick my favorites and give the highlights of that herb, what it is, why it works and how to use it.

Nature’s 11 Most Powerful Antibiotics

• Apple Cider Vinegar
• Garlic
• Ginger
• Horse Radish Root
• Onion
• Habanero Peppers
• Oregano Oil
• Tumeric
• Echinacea (Herb)
• Raw Honey
• Colloidal Silver

Apple Cider Vinegar (ACV)

• A known super food with incredible healing properties.
• Vinegar has been used for centuries as a natural remedy to fight infections.
• ACV is also used for its benefit in beauty, from hair to sun burns.
• Some even use ACV as a cleaning product.
• It’s loaded with antioxidants, vitamins, minerals and enzymes. However, not all apple cider is created equal.
• This is what you need to know: Don’t reach for the clear, amber vinegar. You want the one that looks murky and has “sediment” floating in it.
• That murky substance in the vinegar is actually called the “mother,” which means it still contains the beneficial compounds (including antibiotics).

5 Important Benefits of Apple Cider Vinegar

• Lowers blood pressure: Studies show ACV may lower blood pressure and promote heart health.
• Balances Blood Sugar: The acetic acid found in ACV can help balance blood sugar levels and improve diabetes.
• Aids Weight Loss: Studies show ACV to promote fat loss and reduce sugar cravings.
• Fights Colds: ACV is loaded with immune boosting vitamins and antioxidants that keep you healthy.
• Promotes Good Gut Bacteria: ACV contains probiotics [“good” gut bacteria] and a type of acid that promotes the growth of probiotics.

How to use it:

• 6 ounces water
• 1 tablespoon ACV Organic/with the mother
• 2 ounces cranberry juice
• Splash of lime juice

Garlic: Antiviral, Antibacterial and Antifungal

The magic of these three properties make garlic an excellent combatant against a variety of colds, flus, and illnesses. It contains vitamins such as B1, B6, C and A, which are excellent for keeping your immune system rocking.

Garlic (Allium sativum)

• Has been used for medicinal and culinary purposes in countless cultures for thousands of years. It is known to have treated and prevented a wide range of conditions and diseases.
• Allium sativum, aka garlic, is a species in the onion genus, sometimes called “King of the vegetable kingdom”.

How to use it:

Optimum Use: In order to get the maximum benefit of garlic – its antibiotic effect – crush garlic at room temperature and allow to sit 15 minutes. This gives the enzymes time to react. Never cook garlic at high heat – try consuming it raw or cooked very lightly.

Ginger: The Amazing Underground Root

Actually, ginger is a rhizome (an underground stem). It can be dried into a powder or consumed fresh, both with similar benefits.

The Science Behind the Benefits:

Ginger root contains a number of compounds such as gingerols that are able to prevent or reduce immune cell synthesis of cytokines that cause inflammation. (Source: Dr. David Hoskin, Phd.)

Dr. Hoskins is currently investigating how ginger can help people who have diseases caused by chronic inflammation, and how those properties might also protect against cancer.

How to use it:

Add grated ginger into sauces and marinades. Toss a one-inch chunk into smoothies. Infuse in water for tea.

Whole Beauty: The Mind-Body Connection

By halcyon

The winter holidays may be over, but that doesn’t necessarily mean our stresses melt away like snow! To help us get 2017 off to a great start, halcyon delves deeper into the links between our bodies and our minds. Please remember that it’s always advised to discuss changes in your regimen with your doctor or other health care provider, as he or she will be in the best position to address not only your personal needs and special concerns, but also the safety of alternative treatments, as herbs and supplements may also interact with medications or with each other – however, if you’re interested in holistic care, we hope this article will provide you with some opening discussion points!

Honouring the mind and body connection

The Mind and Body are not separate. What affects one, affects the other. (Unknown)

The lure toward holistic care, for myself, is summarised in that short quote. I think the drawback to Western medicine (and what some in the holistic community would deem a failure) is the continued practise of treating the parts as opposed to the whole of the body. This includes not only the body, but the mind as well. There seem to be specialists for everything, and while specialists are not a bad practise, there is an overdependence on them hoping they can fix one ailment, then going to another for a different ailment – and so on.

This makes truly caring for people difficult. If you have a patient with five different doctors for five different problems, you also have the possibility of five different medications, when you might only need one or two to fix a certain problem. If a doctor looks at the whole and not just the parts you reduce the possibility of issues arising from the medications you take. All the contraindications, side effects, and negative interactions that can happen with every medicine you can take, you may not be aware of, and neither may your doctor. This is not to say that some people do not need or benefit from a variety of doctors, and certainly doesn’t mean that you should forgo medical treatment for holistic care, but I think it often would be beneficial used in tandem with other treatments.

I have broken this article into three parts, covering anxiety, depression, and migraines. I have issues with all three, including bipolar disorder, which I have been able to control without meds (though still under the care of a physician) for three years now. I hope to share with you some strategies and alternatives to help combat these issues. I use the word “combat” purposefully, because for those of us with these challenges, it is war. Every day is a fight to maintain balance and feel good.

Anxiety Disorders

These are broadly defined as feelings of anxiety and fear, where anxiety is worry about future events and fear is a reaction to current events. Anxiety feels different for everyone. Mine was oppressive and constricting, so it felt like I could not breathe. My mind would race and I was restless and easily overwhelmed, which may mean I’d burst into tears or get angry within the same hour. Though I’ve tried several things from the list that follows, what works for me and what I will share with you is a combination of yoga, meditation, and aromatherapy. I have included a favourite yoga pose, breathing meditation, and aroma therapy blend.

Alternative treatments for anxiety:

• Acupuncture
• Massage therapy
• Meditation
• Regular exercise, including yoga
• Essential oils & aromatherapy
• Chamomile tea
• Avoid caffeine and nicotine
• Sleep more
• Natural B12, Omega 3’s and St. John’s Wort, & L-lysine

Yoga Pose: Baddha Konasana (AKA Cobbler’s Pose)
Cautions: Do not do this pose if you have a groin or knee injury. Always use a blanket as support under outer thighs.
Benefits: Stimulates the heart and improves general circulation. Traditional texts also say it destroys disease and eliminates fatigue which can help with anxiety.

Breathing Meditation Technique:

I have used meditative breathing for over 20 years now. I’ve used it not only to help reduce anxiety but to get through four childbirth labours. One of my favourites to use is:

The Measured Breath

• Breathe in slowly through your nose. Count to four, pacing your breath as you inhale. Keep your shoulders down and allow your stomach to expand as you breathe in. Once you’ve breathed in completely, hold a moment, then release the breath slowly and smoothly to a count of seven. Repeat as necessary.

Aromatherapy Blend for Anxiety

Relaxing Blend

• 1 drop Lavender
• 1 drop Sweet Marjoram
• 2 drops Red Mandarin
• 2 drops of Roman Chamomile

Add to your diffuser or whatever method you use to enjoy scented blends.

Depression

Depression is a prolonged feeling of unhappiness and despondency, often magnified by a major life event such as bereavement, divorce, or retirement. Many women often experience depression after childbirth. Mild depression can sometimes be alleviated using a few simple, natural strategies. It can also be used in combination with medical treatement to help lessen symptoms. I have listed a few that have helped me and may help you, too.

Tea for the Soul

• Hops, valerian, and powedered licorice are mood stablisers. Ylang ylang, lavender, clary sage, and chamomile are sedative and can calm depression.

Take a Break – Escape!

• A weekend, a day; heck, even a few hours will do tremendous things to boost your mood. Finding somewhere different, or even a favourite place you find restorative, can reset your mind.

Herbal Power!

• Did you know just 30mg of dried extract of saffron is as powerful as 20mg of the anti-depressent drug Prozac, without the side effects?

The Power of Scent

• A scented sachet of lavender or primrose may help you sleep. You can also try 2 drops each of rose and lemon balm oil and 3 drops of lavender for a restorative and calming effect.

Migraine

Migraine is a recurrent throbbing headache that typically affects one side of the head and is often accompanied by nausea and disturbed vision. These can be especially debilitating. I often find myself in the ER twice a year for a migraine that I can’t kill either with medication or one of the strategies I’ve included, but along with prescriptions designed to prevent migraine, I have curtailed the frequency with which I have them.

Relief – sip by sip

• Yes, we revisit tea. I have found a number of ways tea can enhance life and migraine is one of them. Try a blend of my favourite [1 TBS of the following combined herbs: feverfew, lavender and peppermint] boiled with a cup of water and allowed to steep for 15-20 minutes. You can also add a bit of honey or agave to sweeten it.

Eat your way to being headache free!

These foods have been shown to help prevent or treat migraine:

• Omega-3 foods like nuts, seeds, and wild fish like salmon help control blood flow, lower inflammation, and prevent electrolyte imbalance.
• Magnesium rich foods like Swiss chard, pumpkin seeds, yogurt, kefir, and almonds.

Editor’s note: Even a single health care provider may not be aware of every side effect or potential interaction of mixed medications, and, sadly, it’s also true that some simply don’t care. If your doctor is unable to answer questions to your satisfaction, or you find that you’re having difficulties with the treatment regimen you’re already on, do your own research and come to your next appointment ready to discuss the matter in more detail. If he or she still refuses to address your concerns and you have the option of visiting another provider, it may be time to seek a second opinion.

Whole Beauty: A Holiday Breather

By Halcyon

We all deal with the ups and downs of day-to-day life, but unless you’re Martha Stewart, the holidays can be especially stressful. In this issue, halcyon introduces us to some simple techniques to help you ground and re-center. Please remember that it’s always advised to discuss changes in your regimen with your doctor or other health care provider, as he or she will be in the best position to address your personal needs and special concerns, particularly with regards to physical activities to which your body may not be accustomed – however, if you’re interested in holistic care, we hope this article will provide you with some opening discussion points!

Peace and Mindfulness Edition

Sophrosyne: (n.) a healthy state of mind, characterized by self-control, moderation and a deep awareness of one’s true self and resulting in true happiness.

Even on a good day with the best of intentions, achieving balance and self-awareness – never mind true happiness! – can be a challenge. Throw into the mix the joyful noise of the holidays, with parties, family, gift giving, and a society that has been sucked into the commercialism of the holidays, and you have a potent mix that can be physically and emotionally draining. Complete with superhero cape, I’m here to the rescue to give you some tips and strategies to keep it together, even when the in-laws come to visit or crazy Uncle Al drains the punch bowl and wants to sing carols in his boxer shorts!

• Mindfulness: The act of having an awareness of the world around you.

By doing this you keep yourself in the present instead of running in all directions as you try to complete everything on your to-do list. Think of it as hitting a pause button, taking a few moments to breathe and focus on the here and now. I’m not going to lie and say that after using these strategies, you will suddenly be serene and magically centered, but with practice you can get there!

Slow it down

These days, technology is at our fingertips. Your boss can get a hold of you via text or email, all just a tap away on your phone. Likewise, we’re bombarded with news and soundbites of all sorts from all directions. It’s no wonder we’re running around frantically, feeling overwhelmed and unable to wind down. This first strategy places an emphasis on deliberately slowing down. I use tangible objects to remind myself – my favorite being cat’s eye stone, because it reminds me of the third eye chakra and focus. I keep the stones in my pocket, in my purse, even in drawers, so that when I see it, I know to tell myself to slow down, take a breath, and be present.

Breathe

We all do this without so much as a thought. Breathing, in the way I will outline, is a game changer in the art of mindfulness. This deep breathing technique is specifically created for easing nervous tension and is excellent for simply bringing some focus back into your day. It’s the 4-7-8 technique: 4 seconds inhale, 7 seconds hold, 8 seconds exhale. You can do this wherever and whenever you need to slow down.

Mantra Power

The same as breath control helps us to center and focus via the body, so does the mantra do for us via the mind. There is true innate power within ourselves and these words help to bring it out.

When using a mantra, or by utilizing it in a chant, visualize the words and meaning vibrating through your entire being.

There is a definite connection between the mantra and the chant itself. Both the repetitive nature and tonal quality influences an alteration in our brain that can elevate mood and leave you feeling invigorated.

Here are a couple of mantras and their meaning to help get you started:

Om

• Means the sound or vibration of the universe. It’s the single most important mantra and meaning in the east.
• Om goes beyond beginning or end and symbolizes the trinity of Vishnu, Brahma and Shiva.

By chanting Om, you bring yourself into a calm and balanced state. The vibration helps the mind to release restless thoughts and focus on the moment.

Om Mani Padme Hum

• This is the most important mantra in Buddhism. It means “Jewel in the Lotus”. It is a way of saying that in the mud of self-limitations, we are all jewels waiting to be uncovered.

This chant helps to unlock the compassion hidden within. By speaking or chanting this regularly, and with good intentions brings a cleansing sensation to the mind.

Keep Calm and Drink Tea

Don’t worry, it doesn’t have to be tea! Coffee, cocoa, or your personal favorite hot beverage all work great. The key here is making it yourself, as it become an act of nourishing ourselves that brings us right into this moment.

Have a conscious awareness of what you are doing at the time you prepare your drink. Even if you’re just heating water in the microwave, try to slow down and take note of your senses. Be aware of your breath and being present as you give yourself this gift of something warm.

Stop and Do Yoga

I’m not going to try to get you to turn yourself into a pretzel! While this is not one you can just do while you’re losing your mind at the mall during Black Friday, (though if you do, please Snap Chat!) once you get to a quiet place, give it a shot. I promise you’ll thank me.

Child’s Pose (Balasana)

• Helps to release neck, shoulder, and upper back strain. It can also help to calm the nervous system through steady conscious breathing.

Kneel on the floor and sit on your heels. Allow yourself to bend forward and relax into the stretch. You can either rest on your chest or your thighs, or for a full stretch, spread knees out to the side, keeping your feet together and lower your torso towards the ground. Your arms can be stretched out in front of you or reaching back towards your feet.

Legs Up the Wall (Viparita Karani)

• This pose can relieve a lot of tension in the hips, a great source of lower back pain.

Set up a folded blanket beside the wall. Lay on your left side with your hip on the edge of the blanket, as if you are sitting on the wall. Kick your legs up and lay on your back with your legs straight up the wall and the blanket beneath your hips. Relax into this restorative pose and if you can, stay here for at least 5 minutes. To get out of it, bend your knees to your chest and roll on to your side.

Seated Forward Bend (Paschimottana sana)

• This pose calms the mind, reduces headaches, and can lower blood pressure.

Begin by sitting up straight with your legs stretched out in front of you. Keep your spine straight and your feet flexed, so that your legs are engaged. When you exhale, lean forward, hooking your finger around your big toe if you can reach. If you can’t, don’t over-stretch; just rest your hands on your knees or whereever is comfortable for you. With each breath continue to deepen your stretch and find more space between each vertebrae.

Whole Beauty: Hair Care

By Halcyon

halcyon returns this issue with suggestions for how to take your natural beauty journey from skin to hair! Please remember that it’s always advised to discuss changes in your regimen with your doctor or other health care provider, as he or she will be in the best position to address your personal needs and special concerns – however, if you’re interested in holistic care, we hope this article will provide you with some opening discussion points!

Whole Beauty
Mind.Body.Soul

The Pursuit of Beautiful Hair!

I think that for women, hair can be an important aspect of femininity. Long hair seems particularly important as both a goal for young girls as well as how young girls define themselves. Without wandering too off course from the scope of what I’d like to discuss, I wanted to give a bit of background of where this ideal of long, luxurious hair comes from.

Historically, we have seen this ideal of short hair = masculine, long hair = feminine emerge on multiple occasions. Here are some examples:

• The Romans insisted that soldiers have short hair because flowing locks and a centurion helmet were not the best fit.
• Alexander the Great was also very keen on making sure soldiers kept hair short and faces clean.
• From WWI onwards, we can see that this concept of short hair in the military grew and was an important means of establishing control and maintaining obedience.

(MentalFloss.com)

Evolutionarily speaking, consider this:

• Long, healthy hair is a potent sign both of youth and reproductive fitness. This signal is broadcast to potential mates and increases the likelihood of reproducing.

So now that we know a little about why long hair is such an important part of the feminine identity, let’s take a look at ways we can take care of our hair that will be healthier and may even save you a few bucks.

No-Poo!

This is the slang terminology for no shampoo in the holistic community. You might recoil from the idea at first, but let’s take a closer look.

Conventional products are laden with chemicals and the misguided advise that these products are good and provide a lifetime benefit of healthy hair. This could not be more wrong. The no-poo method allows your hair to self regulate, which in the end, will make your hair shinier, healthier, and more manageable.

Method: A Beginner’s Guide

To begin, a word of advice: Don’t dive straight into no-poo, because you won’t get the expected results. I’ve knowledge of this first hand and from other sources who advise the same thing. What I would suggest is to begin with an organic, sulfate-free shampoo and give your hair time to adjust. This will help greatly, because as you read on, you will understand that your hair will continue to detox even after switching to sulfate-free cleansers and transitioning into no-poo.

The traditional method of no-poo dictates using a baking soda and apple cider vinegar rinse to cleanse and soften hair. The point of this system is to leave the hair alone as much as possible, which means cleansing hair only once per week – or even less, if you are feeling brave! This has been the most difficult part for me because of this link between suds and clean. You’ve reached the Holy Grail of no-poo when you can stop using baking soda and apple cider vinegar and clean your hair with only water. It seems impossible, but some have been able to achieve it. The best the rest of us can hope for, however, is diluting the solution used in the hair a bit at a time. Keep in mind you can still wet your hair between washes. Massaging the scalp as the water runs through it is excellent and relaxing. Another little tidbit of advice is to use a boar bristle brush every few days to distribute the oils in your hair for natural protection. This will also give it shine, and as your hair transforms, it will gain a natural bounce.

Why go No-Poo?

I could go on and on, but in the interest of keeping it simple, let me sum it up as best as I can! Here’s a brief list of chemicals that have been suggested as link to all kinds of health related conditions:

• Sodium Laurel Sulfate and Sodium Laureth
1) Irritation of the skin and eyes
2) Organ toxicity
3) Developmental/reproductive toxicity
4) Neurotoxicity, endocrine disruption and biochemical and or cellular changes
5) Possible mutations and cancer

These are both classified as detergents and should not be used on the scalp or body. These products also contain by-products of petroleum that takes the form of “mineral oil” in order to give your hair shine, sort of like getting that carnuba wax shine on your car – thanks, but no thanks!

If the chemicals alone are not enough reason to give No-Poo a try, let’s talk money.

A 1lb box of Arm and Hammer Baking Soda runs $1.19 at Walgreens. 16 fl. oz. of Eden Organic Vinegar (Apple Cider) costs $4.00 at Vita cost.com. Both these ingredients together plus tax (which in my state is 8.25%) equal a grand total of $5.62. Now it’s your turn. How much do you pay on products for your hair that are supposed to make your hair look good? Maybe saving a few dollars will inspire a giving this a try for at least a month.

Battling the Concept of Clean

This is the most difficult part about No-Poo – what you perceive as clean is an idea ingrained in all of us through culture and society. I have tried to go No-Poo before and I met with only a measure of success. The change? Re-evaluating what exactly I was putting in my hair and playing with the measurements in the baking soda mixture. One of the number one reasons people back out of this is the Baking Soda Hurdle. Stay the course! The key is trial and error.

Water can rinse away sweat and debris from your hair but it cannot remove build up and oil. This is why you need baking soda.

Here’s a bit of the Science Behind Why:

Baking soda is alkaline, a natural deodorizer which removes excessive oil and other build up. Because of this you really only want to use it once a week. Overuse can actually result in overly delicate hair. This is why some people go running for the hills and question using baking soda – too much, too many days of the week, and you will fry your hair. And here’s another tidbit: If you need to wash your hair more than once a week, use a raw honey mixture between washes.

Raw Honey Mixture: 2TBSP Raw Honey in 16oz of chamomile tea or plain water. Apply to roots of hair and massage, then rinse with cool water.

So make a thoughtful, conscious choice as to whether or not to go No-Poo. It takes a measure of patience and willingness to go on this journey and you should endeavor to at least give it a month to really make an educated decision!

Editor’s Note: Sodium laurel sulfate (SLS) and sodium laureth are cleansing and foaming agents that are found in many home and beauty products, not just shampoos! The toxicity of these agents is debated, but they’re currently considered safe for general consumer use in the United States – however, even with that approval, they are known to cause dryness, sensitivity, and other reactions in some people. If you’re concerned about the chemicals used in your household or suspect you may be sensitive to SLS, ReVolutionary Theory encourages you to do your own research – switching to a more natural product, or one that uses alternative agents, may well be the solution for you! As always, however, you should consult with a knowledgeable health care provider if you’ve developed a serious reaction or have more in-depth questions about what’s allowed by the FDA and why – we’re not qualified to advise or diagnose you from here!

Whole Beauty: A Holistic Journey

By Halcyon

In response to another chatter request, we’re launching a series that’s all about helping you be the best you that you can be, and to start us off right, Halcyon is going to talk with us about approaching health and beauty from a holistic perspective! Please remember that it’s always advised to discuss changes in your regimen with your doctor or other health care provider, as he or she will be in the best position to address your personal needs and special concerns – however, if you’re interested in holistic care, we hope this article will provide you with some opening discussion points!

ho•lis•tic:

ho’listik
adjective
Philosophy
adjective:
1. characterized by comprehension of the parts of something as intimately interconnected and explicable only by reference to the whole.

In recent years, I have seen a jump in the awareness of the mind/body connection. Being an avid yogi, homeopath, wild herbalist, and Wiccan, it has been heartwarming to witness. I have tried a lot of “natural” and “organic” products with both positive and negative results. I think for the most part, this wave towards products that are less chemically toxic and better for the environment is a step in the right direction, but often the cost of these “greener” and “better for you” products come with a steep price tag. So because of my background, I decided to embark on a DIY journey, with the end goal being less expensive, but still good-for-you ways to maintain happy skin, happy hair, a peaceful mind, and a healthy body. Maybe some of these ideas will help spur your own journey into the sometimes murky waters of homeopathic/holistic care.

I decided to cover four parts of a holistic integrated lifestyle, which includes skin, hair, mind and body. The ideas encompassed within the scope of this article are meant to touch the surface of what I think could be a long journey into discovering ways to be good to yourself. Who doesn’t want to feel better, be healthier and have more peace in their lives? The rewards are too good to pass up, and when you feel better, there is a domino effect that spills over into the lives of those around you. So let’s take the plunge!

Five Secrets to Great Skin

The first step to Holistic Beauty starts with the skin. Here are six ways to start you on the right path.

• Beauty Sleep

This is not just for Sleeping Beauty, girls. We are busy woman, between work and play, families, or whatever you have going on in your life. So late nights and early mornings will reflect in your skin, and you’ll notice a tired appearance, dark circles under eyes, and that you might experience more break outs that are difficult to banish. This is important.

If any of these apply to you, sleep therapy may be something to consider:

* You get 8hrs of sleep but it’s not near the magic hours of 10pm – 6am.
* You get less then 8hrs on a regular basis and you try to make it up on the weekends.
* You sleep more than 8hrs because you feel you need more.

According to Ayurvedic Principles:

* The most healing effects of sleep occurs between the hours of 10pm – 2am. So getting beauty sleep truly improves the health and beauty of your skin.

• Get Your Sweat On!

So many possibilities! But seriously speaking, exercise is excellent for your skin because of the sweating. You have extra blood flow and oxygenation going on during vigorous exercise, increasing circulation throughout the entire body, which improves the shape of skin cells and keeps them at optimal functioning level. Sweating will not only improve your skin but you’ll feel better and have more energy.

• Your Skin Is Your Temple!

Keeping this in mind, treat your body with respect and be mindful of what you use. Using a cleanser made primarily of chemicals is a disservice. Most of these over the counter agents will use different acids and chemicals to trick you into thinking you have clean skin, but you end up causing breakouts and damaging your skin in the process. By using an all natural cleanser, whether store bought or homemade, you’re getting rid of one problem without causing another.

The second part to this regime is toner. As toner helps soothe skin, you don’t want to use a store bought toner that is not made from natural ingredients. The best end results come from products made with natural fruit and vegetable extracts that will nourish your skin instead of wearing it out. Stay away from toners with harsh chemicals meant to be used as an astringent. They will often leave your skin red, dry, and uncomfortable!

• Oooh, the Moisture!

Have you ever taken a look at the vast amounts of moisturizing products lining the shelves of your local drugstore? Most of these have a ton of ingredients that you can’t even pronounce. A good rule of thumb, girls: If you can’t pronounce an ingredient, it’s most likely a chemical and does not belong on your face. Look for natural ingredients, the sorts that you’d like to eat. Skin is super absorbent, so when you’re slathering on a moisturizer, you want something that won’t be harmful to you. Remember – your skin is the largest organ and it’s important to take care of it.

• Hail Hydration!

While keeping hydrated has a number of excellent benefits, from making you more energetic to giving you a slimmer appearance, it will also provide your skin with the moisture it needs to look and feel its best. Though there’s a bit of controversy, the best calculation thus far to determine how much water you should be drinking is to take your weight and divide it in half, and that number is what you should be consuming in ounces.1,2 It may seem like a lot of water, but the benefits will astound you.

Note: If you’ve been dehydrated for a long time, increase your water intake gradually to give your body time to adjust, or you will feel bloated and uncomfortable.

This is just the beginning of the journey into holistic beauty and health! There is so much to share and I am hoping that there might be a way to embark on a few experiments together, chronicling our progress and sharing things that worked and things that did not. I haven’t worked out the details yet, so stay tuned, because there’s more to come! For now, I hope this has been a helpful start into what could be a whole new way of taking care of you.

(1) Chek, P. (2004). How to eat, move and be healthy!. San Diego, CA: C.H.E.K. Institute

(2) Editor’s note: While proper hydration is a must no matter your care regimen, many people aren’t aware that too much water can be as dangerous as too little. “Water intoxication” is a medical emergency caused by the intake of excessive amounts of water in a short period of time. It alters the natural balance of electrolytes in the body and can result in cellular swelling, damage to the central nervous system, and even death. The calculation suggested in this article is meant to correspond with what you’ll drink over the course of an entire day, and not the amount that should be consumed in one or two sittings. We can’t stress enough that the best way to determine what’s right for you is to consult with your physician!